Thanks to you guys, I'm slowly gaining confidence with my new LS3020 and am thrilled with the results. One thing I'd like to improve, though, is the appearance of my 3mm and 5mm acrylic shapes which have "burn marks" or "backsplash" on the reverse. It's as if the laser is reflecting back off the honeycomb table and scorching the underside of any work I'm cutting.
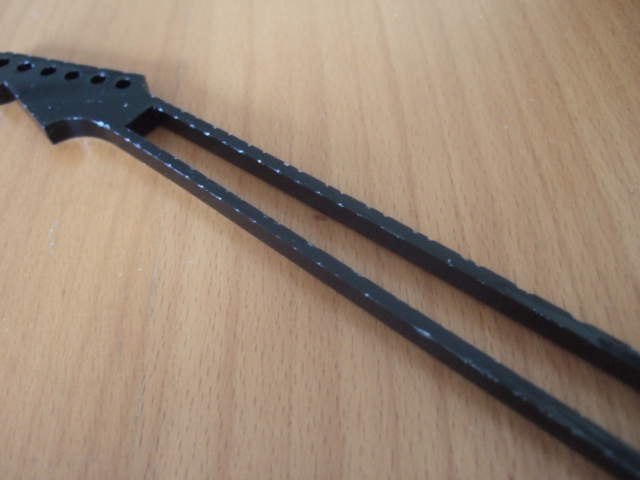
On some colours, it's not too noticable, but on black, for example, it makes the back (and sides) of the shapes look a bit tatty.
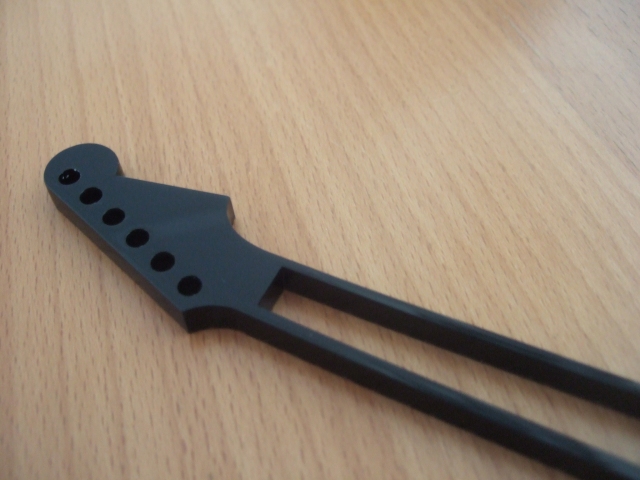
The front of the acrylic shape is perfectly cut each time:
I'm sure I read somewhere about people solving this with glass in the bottom of the cutting bed - but I can't find those posts now. I've tried running at slower speeds and lower power, higher speeds and more power and all kinds of combinations inbetween. If I cut too quickly or without enough power, it doesn't always cut all the way through. I have considered taking the honeycomb bed out and using a sacrificial piece of acrylic as the base; but then the vapourised plastic tends to collect in oily puddles underneath the piece being cut and causes different patterns to appear on the reverse side.
Any suggestions would be appreciated. Thanks!
Chris
burning on reverse side
Re: burning on reverse side
Search for Tweakies posts - he uses glass. I tried it and it works but did not have a bit thick enough so it cracked, although I did use it on top of the honeycomb.
I use small magnets to raise the material off the bed and a couple of sheets of paper, this helps a lot but you do have to keep an eye on it as the gas builds up under the material as you get a mini explosion which could catch the paper. Also leaving the protective covering on the acrylic helps.
I have started to make a pin bed from aluminimum but just don't seem to get time to finish it. Hopefully it will cut down the reflections and help with extraction.
Cheers
Dave
Using two LS3060's and an ex 3020 user
Please note I am not employed by HPC, any advice or recomendations I give are based on my own experience and are not necessarily the same as HPC's. First point of contact on any hardware issues should be with HPC
Re: burning on reverse side
I have a couple of plans for the beds as well, but cannot find suitable materials! I do plan on making my own anodising kit, but thats when I get my first industrial unit .
I always leave the protective covering on when only cutting, remove the covering when also engraving (as it tends to leave bits of covering in the engraved part) and always leave it on the back. Means you get no smut.
http://www.tmbelectronics.com - Electronics, tools, hobby tools, power tools, and much more!
An ex LS3020 user now playing with an LS6840PRO (60W) and an LS1290PRO (80W)
Re: burning on reverse side
I think you just have to experiment until you find the right combination when it comes to acrylic.
I made my own cutting table which has wider spacing than the standard honeycomb and it has a 6mm glass base and this seems to work the best.
I have found that the plastic covered acrylic gets a slightly raised edge if cut with the covering left on whereas the paper covered acrylic can easily ignite if the air assist and extraction are not set just right.
Once you get it all set up correctly, acrylic is such wonderful stuff to work with - acrylic and lasers were just meant for each other.
Tweakie.
Re: burning on reverse side
Whats your bed made from?
http://www.tmbelectronics.com - Electronics, tools, hobby tools, power tools, and much more!
An ex LS3020 user now playing with an LS6840PRO (60W) and an LS1290PRO (80W)
Re: burning on reverse side
They are the slats from a scrap Venetian blind which have been formed to shape then inserted into an mdf box. They are quite a tight fit and although they are not mechanically fixed to each other they do not move during use or when the box is stored vertically.
This was originally only made as an experiment but it worked so well I am still using it, in fact I now have two (one just for acrylic and one for wood and other messy stuff).
Tweakie.
This was originally only made as an experiment but it worked so well I am still using it, in fact I now have two (one just for acrylic and one for wood and other messy stuff).
Tweakie.
Who is online
Users browsing this forum: Ahrefs [Bot], Semrush [Bot] and 0 guests