Because I can. This card and a handfull of 15mm hearts cut from red acrylic, each with a 3mm etched pit for a tiny magnet.
Pics of what youve done
-
DukeEuphoria
- Posts: 15
- Joined: Thu Feb 11, 2010 2:38 pm
- Contact:
Re: Pics of what youve done
Thought I would share this with you all. I don't normally do flat work so was quite pleased with the outcome.
SWMBO wanted a new head board and suggested I made one and include some veneer inlays made on the laser- this is the result:-
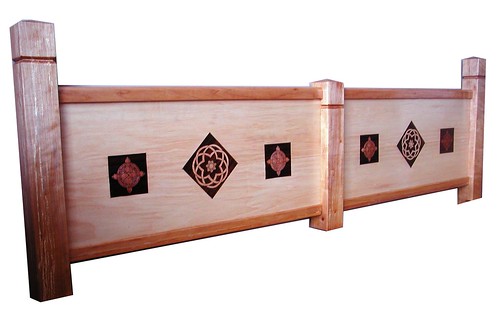
Head board 2
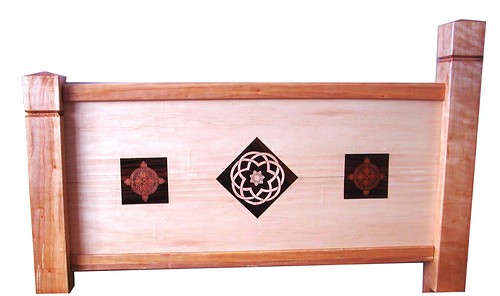
Head board 4
Made from a plank of Alder, 9mm ply veneered using a JML cheepo vacuum press (not recommended).
In all I think it could be better but Mrs Dave likes it a lot so I am happy
Dave
SWMBO wanted a new head board and suggested I made one and include some veneer inlays made on the laser- this is the result:-
Head board 2
Head board 4
Made from a plank of Alder, 9mm ply veneered using a JML cheepo vacuum press (not recommended).
In all I think it could be better but Mrs Dave likes it a lot so I am happy
Dave
Using two LS3060's and an ex 3020 user
Please note I am not employed by HPC, any advice or recomendations I give are based on my own experience and are not necessarily the same as HPC's. First point of contact on any hardware issues should be with HPC
Please note I am not employed by HPC, any advice or recomendations I give are based on my own experience and are not necessarily the same as HPC's. First point of contact on any hardware issues should be with HPC
Re: Pics of what youve done
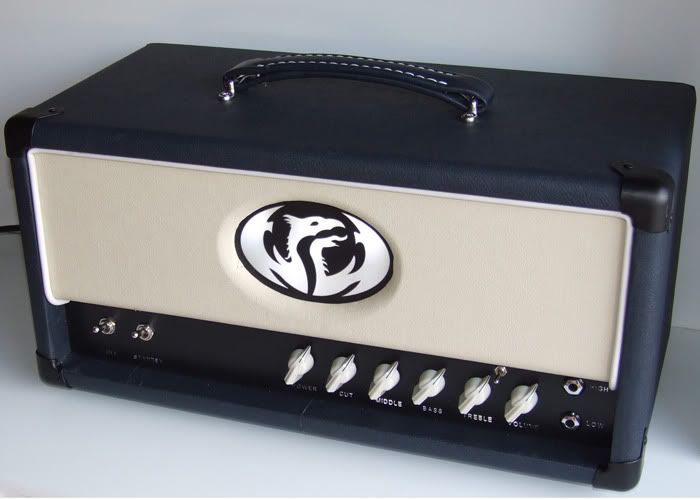
Heres a guitar amp I built with the help of a laser cutter,
the light up logo and faceplates where all done on the engraver,
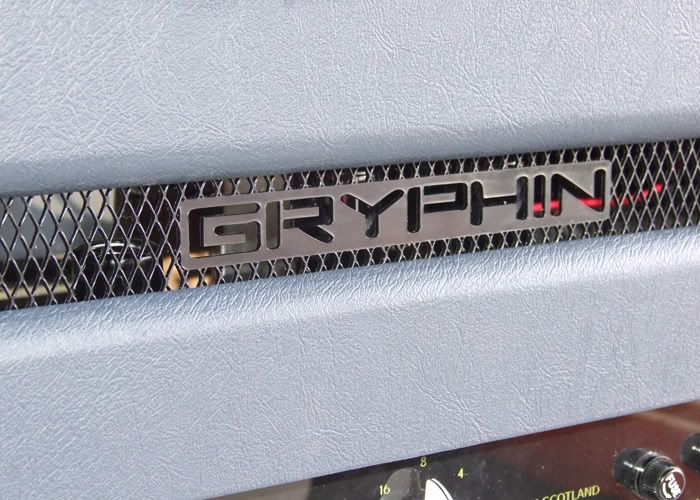
the rear panel mesh was cut out on the engraver, with the Gryphin text
I made jigs out of 8mm acrylic for a wood router to follow, these were used to machine the oval shaped holes in the cabinet
the light up logo and faceplates where all done on the engraver,
the rear panel mesh was cut out on the engraver, with the Gryphin text
I made jigs out of 8mm acrylic for a wood router to follow, these were used to machine the oval shaped holes in the cabinet
-
robburge@sky.com
- Posts: 48
- Joined: Sat Oct 16, 2010 4:10 pm
- Contact:
Re: Pics of what youve done
Here's my latest model: a Saxby and Farmer signal box (Drayton) in 7mm scale:
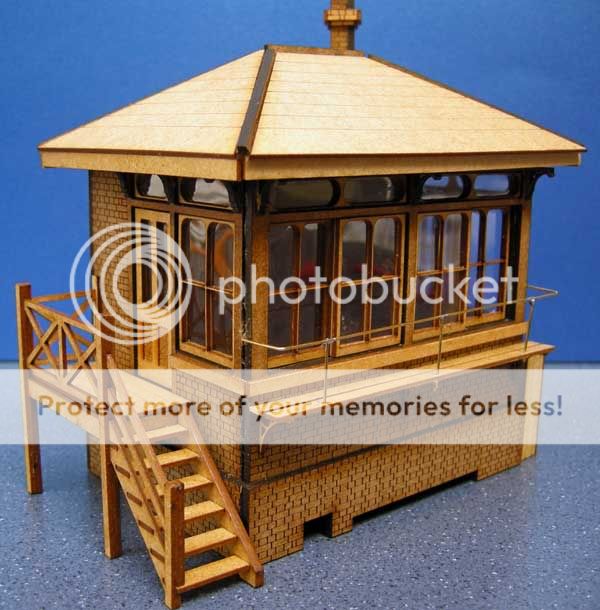
Regards
Rob
Regards
Rob
Re: Pics of what youve done
Very nice Rob
Dave
Dave
Using two LS3060's and an ex 3020 user
Please note I am not employed by HPC, any advice or recomendations I give are based on my own experience and are not necessarily the same as HPC's. First point of contact on any hardware issues should be with HPC
Please note I am not employed by HPC, any advice or recomendations I give are based on my own experience and are not necessarily the same as HPC's. First point of contact on any hardware issues should be with HPC
Re: Pics of what youve done
I like the detailing - nice model!
Bob
Bob
LS3020 used for hobby - making model railway buildings/signals etc.
Re: Pics of what youve done
A few more pictures of 'railway modelling' stuff done on the laser.
First the engine shed finished with lighting and a yard at the side in 4mm ('00') scale. Someone's stolen an old brewery gate for the entrance! The different stone wall effects show up on this, engine shed on black card and the gate buttresses and wall on the white card. Gate is also a couple of layers of mount card sprayed with grey car primer - as is fencing along side. Everything else is as it came from the laser - no painting involved. Sideframes on green card, roof and downpipes (4 layers of card) on brown. 'Cobblestone' effect on ground is also laser-engraved black card.
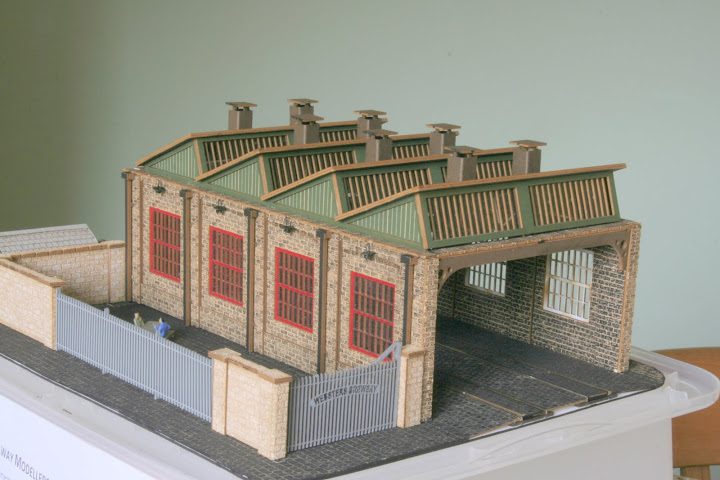
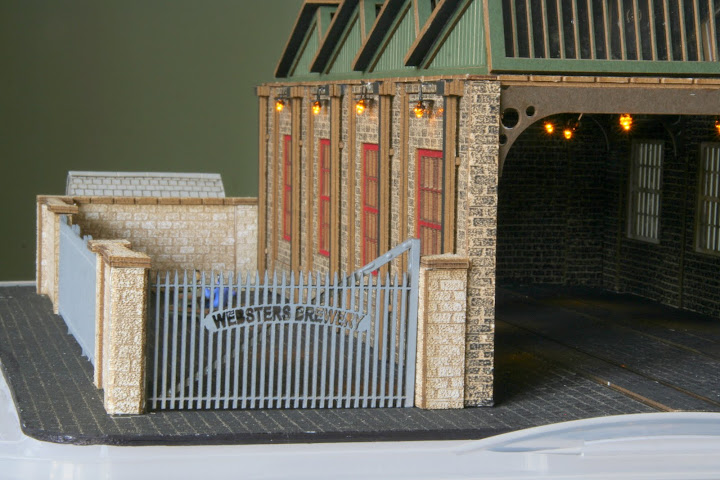
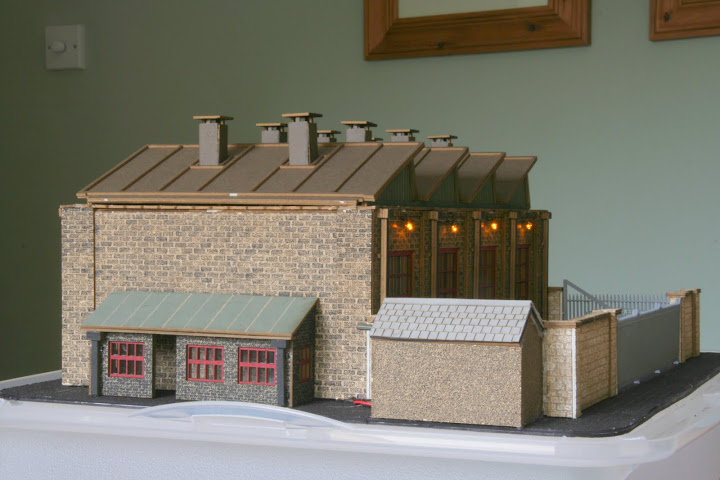
Hut to right is a Corel Draw 'texture' laser engraved onto black card to give a 'rough concrete' finish. Rear workshop on left is on black card but with laser power turned down which gives a darker appearance to brickwork - more black card showing through.
I'm making a Control Panel for the club layout - here are the inner struts in 3mm laser ply with cut-outs for 15-way D-sockets. These are a pain to cut out using normal 'woodworking' tools - but easy for the laser!

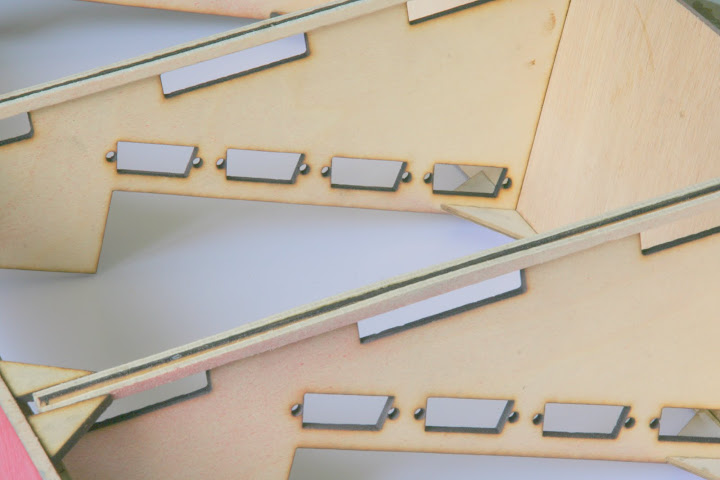
Close-up of the D-socket holes.
The top panel is engraved in white/red plastic laminate (like the stuff Chris sells). Again I did some mock-ups in card ensuring that all the holes for the switches etc., lined up before cutting in plastic. Top is glued to 3mm laser ply and done in A4 sections because that's all my laser will take!
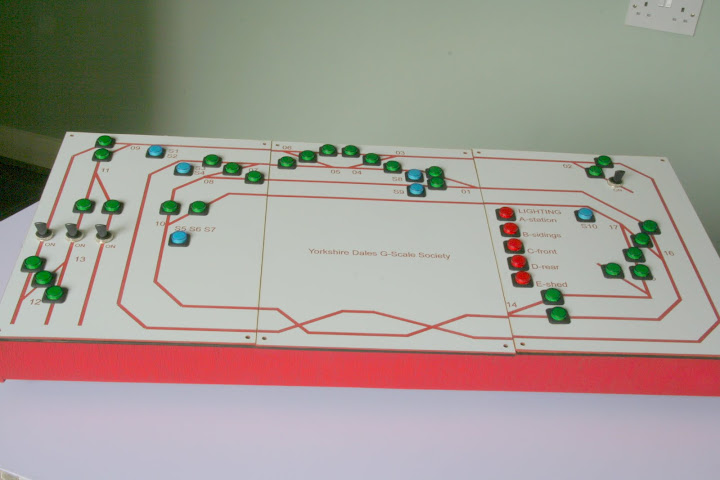

Close up panel and switches.
Hope above useful to others. Just starting on some colour-light and semaphore signals. Beauty of doing these in CorelDraw and laser is that once I have drawings for the G-Scale signals I can re-scale smaller to 4mm '00' scale and with a bit of work on the smaller holes and cut-outs (to allow for the laser 'kerf') I'll have the signals in a different scale with little effort!
Bob
First the engine shed finished with lighting and a yard at the side in 4mm ('00') scale. Someone's stolen an old brewery gate for the entrance! The different stone wall effects show up on this, engine shed on black card and the gate buttresses and wall on the white card. Gate is also a couple of layers of mount card sprayed with grey car primer - as is fencing along side. Everything else is as it came from the laser - no painting involved. Sideframes on green card, roof and downpipes (4 layers of card) on brown. 'Cobblestone' effect on ground is also laser-engraved black card.
Hut to right is a Corel Draw 'texture' laser engraved onto black card to give a 'rough concrete' finish. Rear workshop on left is on black card but with laser power turned down which gives a darker appearance to brickwork - more black card showing through.
I'm making a Control Panel for the club layout - here are the inner struts in 3mm laser ply with cut-outs for 15-way D-sockets. These are a pain to cut out using normal 'woodworking' tools - but easy for the laser!
Close-up of the D-socket holes.
The top panel is engraved in white/red plastic laminate (like the stuff Chris sells). Again I did some mock-ups in card ensuring that all the holes for the switches etc., lined up before cutting in plastic. Top is glued to 3mm laser ply and done in A4 sections because that's all my laser will take!
Close up panel and switches.
Hope above useful to others. Just starting on some colour-light and semaphore signals. Beauty of doing these in CorelDraw and laser is that once I have drawings for the G-Scale signals I can re-scale smaller to 4mm '00' scale and with a bit of work on the smaller holes and cut-outs (to allow for the laser 'kerf') I'll have the signals in a different scale with little effort!
Bob
LS3020 used for hobby - making model railway buildings/signals etc.
Re: Pics of what youve done
Excellent work Bob
Dave
Dave
Using two LS3060's and an ex 3020 user
Please note I am not employed by HPC, any advice or recomendations I give are based on my own experience and are not necessarily the same as HPC's. First point of contact on any hardware issues should be with HPC
Please note I am not employed by HPC, any advice or recomendations I give are based on my own experience and are not necessarily the same as HPC's. First point of contact on any hardware issues should be with HPC
Re: Pics of what youve done
Just repeating what has already been said but that is truly excellent work Bob.
Just a thought, but you have tested that engraving laminate to make sure it doesn't contain any PVC before you put it into your laser ?
Tweakie.
Just a thought, but you have tested that engraving laminate to make sure it doesn't contain any PVC before you put it into your laser ?
Tweakie.
Re: Pics of what youve done
Hi Tweakie
Bought from Hobarts as 'laserable' laminate so hopefully they've done the tests. Didn't seem to give off any more pungent fumes than normal acrylic. I do have a hole in the wall and extract to the outside. Card's OK you get that nice woodburning smell........
Bob
Bought from Hobarts as 'laserable' laminate so hopefully they've done the tests. Didn't seem to give off any more pungent fumes than normal acrylic. I do have a hole in the wall and extract to the outside. Card's OK you get that nice woodburning smell........
Bob
LS3020 used for hobby - making model railway buildings/signals etc.
Who is online
Users browsing this forum: No registered users and 5 guests